

LINK IMAGES
ADD IMAGES
-
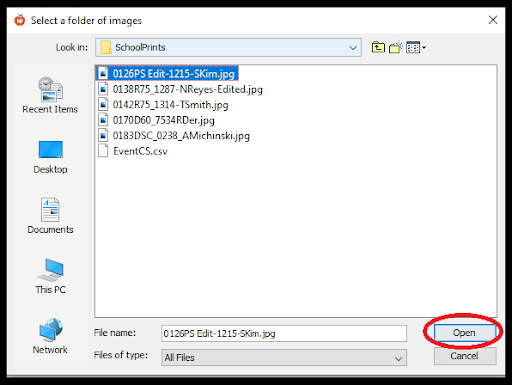
At the beginning of the Event, when creating the Event, the option “Yes, let me select the images now.” was selected, navigate to the folder where the images for the order are stored and click open after selecting one image.
-
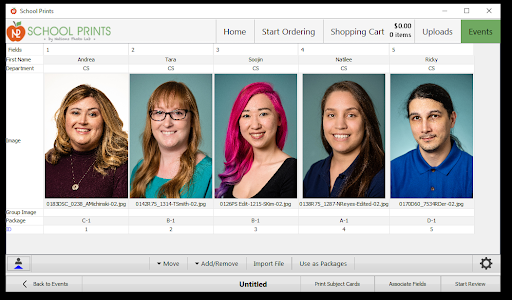
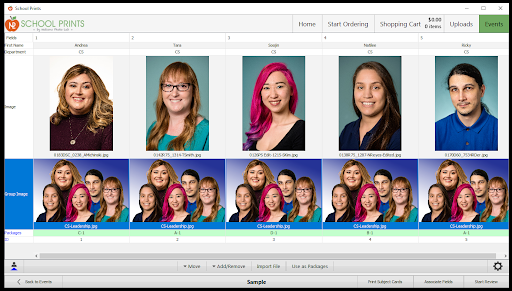
The images will now show on the bottom row in the Events panel.
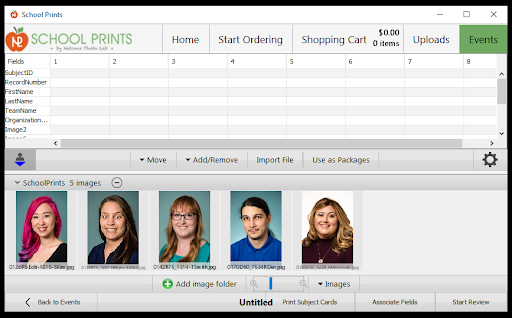
- The images can then be scanned for QR codes, matched by file name in the Event table, or dragged and dropped to the image field to associate them automatically.
- After all other data, if images were not linked when initially setting up the Event, they can be linked at any time after the Event is created.
- To link the images, click the icon on the bottom left that looks like a person.

- Then click either the green circle with the white arrow or the Add image folder button
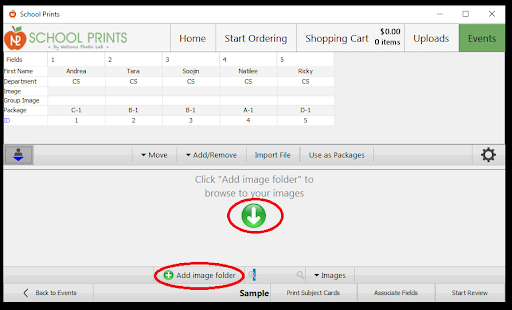
- This will bring up the navigation box to direct School Prints to where the images are located on the local hard drive. Select one image in the folder to add the entire folder.
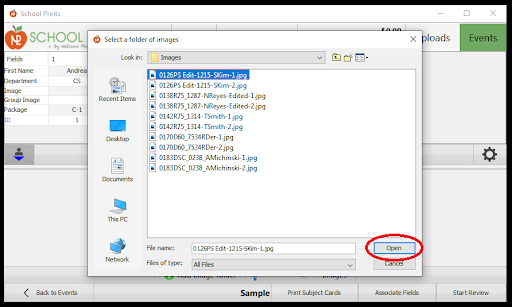
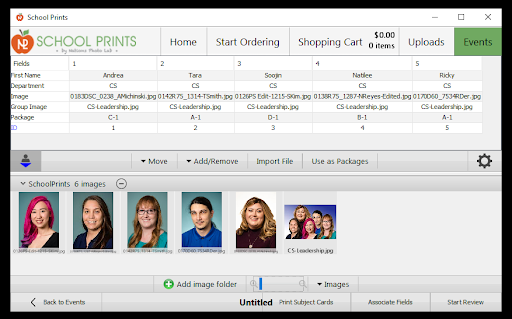
- The images will now show in the bottom row of the Events panel. The images can be added to the Events data table by scanning for subject cards if used, matching the files' names in the table, or dragging and dropping them to the correct field.
----------------------------------------------------------------------------------------
OPTION 1:
QR CODE SUBJECT CARDS
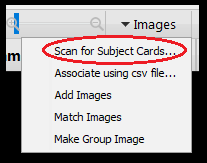
- To scan for subject cards, click the Images button under the image row.
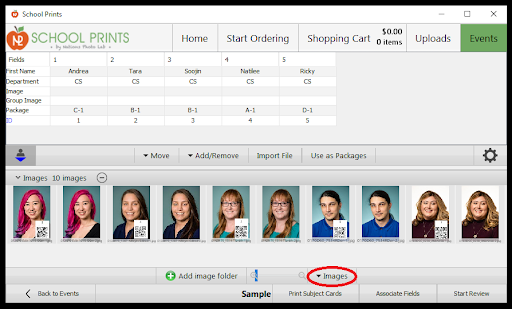
- In the drop-down, select to Scan for subject Cards…
-
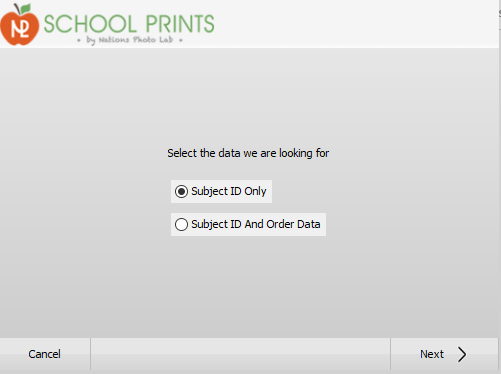
The subject cards can be scanned for either just the ID or the ID and associated Order data.
-
After selecting the needed option, click “Next.”
If School Prints can read the QR codes, it will automatically sort the images into the ID column for the subject card.
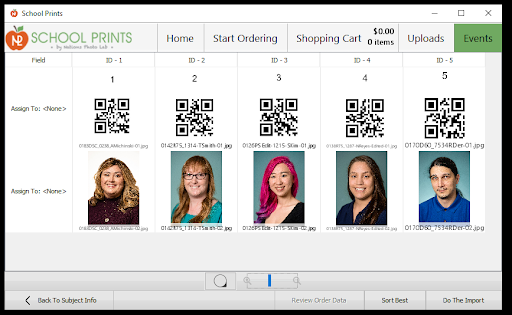
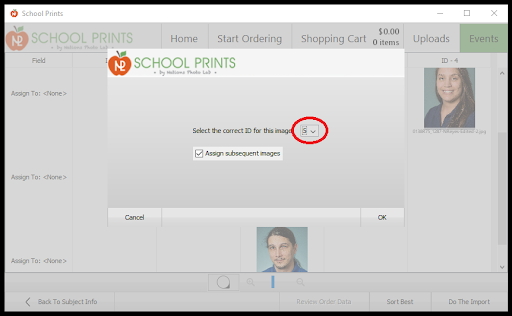
- Any subject card that did not properly scan can be labeled as a subject card by clicking on the card, then right-clicking and marking it as a subject card.
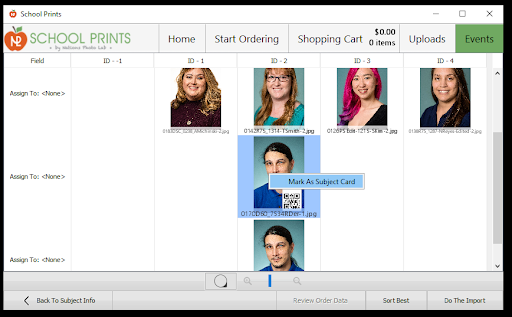
- The subject ID number for that card will need to be assigned in the pop-up. Only Subject ID numbers that do not have subject cards will show in the drop-down list. Having subsequent images also assigned to the ID tag will ensure all poses for that subject are in the correct column.
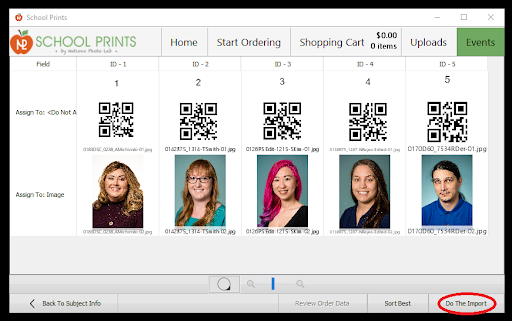
- Once the images are sorted into their columns, assign the correct field tag to the images. All rows in this table must be assigned a field in the drop-down.
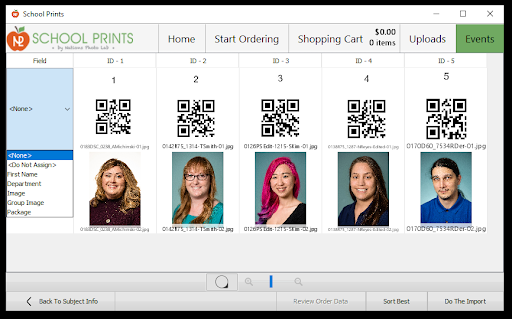
- If a row is not needed, it can be assigned as <Do Not Assign>. After all rows have been assigned a data field, click “Do The Import” on the bottom right.
-
The assigned images will now show in the correct fields in the Events table.
----------------------------------------------------------------------------------------
OPTION 2:
MATCH IMAGES FROM THE DATA TABLE
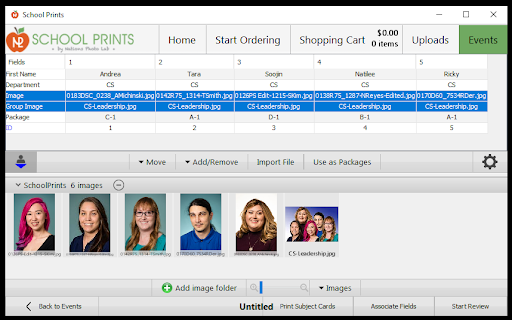
- The image file names can be typed directly into the data table in Events or can be part of the .csv file imported at the beginning if the data is already available.
-
The file names must have the file type included in the data cell, or School Prints will not be able to locate the file.
-
To link the image in the bottom row into the data table, highlight the rows with the image names.
-
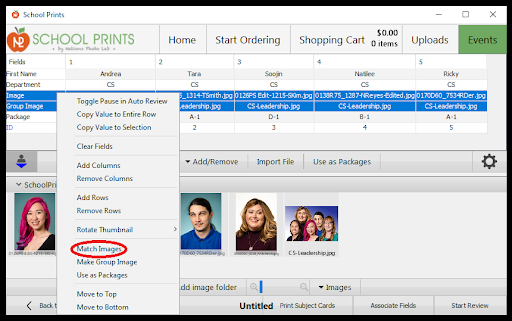
Next, right-click on the row(s) and select Match Images in the dropdown.
-
In the pop-up, select “Use Thumbnails.”
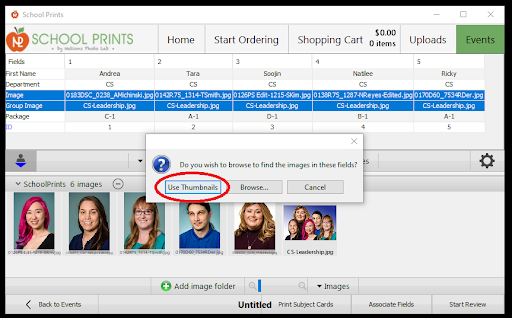
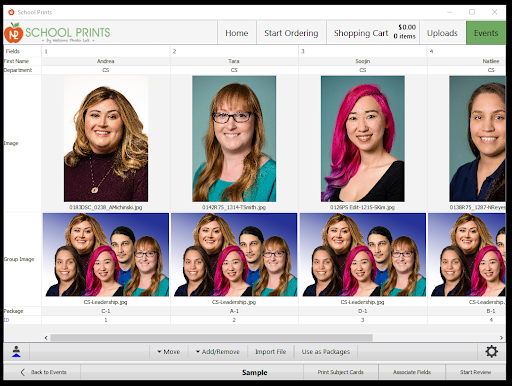
- The images will now appear as thumbnails in the Events table.
----------------------------------------------------------------------------------------
OPTION 3:
LINK IMAGES BY DRAG AND DROP
- If the images are not added to the Events table by QR Codes or Matching the file names The images in the bottom row can be added to the table by dragging and dropping them.
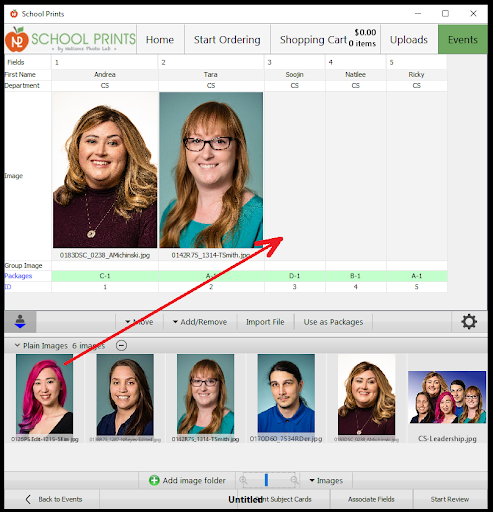
-
If there is a group image, this can be added to one cell in a row, and then it can be marked as a group image for subsequent cells. To do this, drag the image to the first cell it will show in. Then right-click on the cell and select “Make Group Image.”
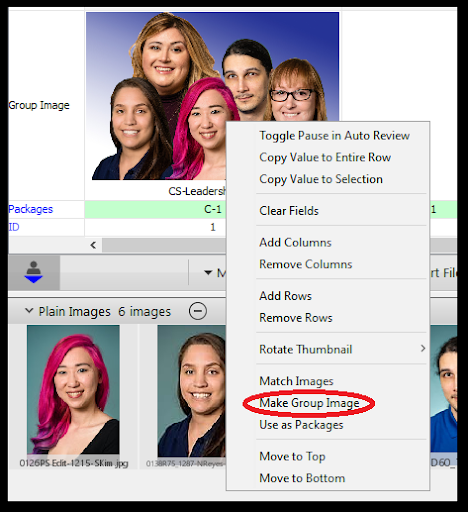
-
In the pop-up, select the Row the group image needs to be associated with and if the image will be in the previous records or the next records. Then type the number for how many records will use the file. If the selected cell is included in the number click the check box to mark it as included.
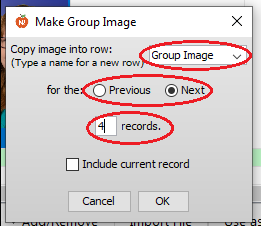
- Once the selections have been made, click “OK” this will have the group image appear in the noted cells.
----------------------------------------------------------------------------------------
Complete the final step below to finish the Event
Comments
0 comments
Article is closed for comments.